Showing posts with label Recipes. Show all posts

Tuesday, July 28, 2015

Berry Buttermilk Lemon Pancakes - To die for

Just so many blueberries this summer in the Lewman household. My pregnant self could not get enough of them. Discovered the wonderful world of blueberry u-pick farms in Oregon. 


Eating fresh is wonderful, but also trying to find some awesome recipes to use them in. 

Berry Buttermilk Lemon Pancakes

Ingredients

1 teaspoon salt
2 teaspoons baking powder
1 teaspoon baking soda
2 cups of sifted flour
2 tablespoons sugar
2 eggs, slightly whisked
2 cups of buttermilk
2 tablespoons butter, unsalted and melted
Berries of your choice

Topped with berry syrup, squirt of lemon juice, and light sprinkle of powdered sugar.

Instructions

Preheat a griddle to medium heat.
In a medium bowl, whisk together the salt, baking powder, baking soda, flour and sugar. In a separate bowl, whisk together the eggs and buttermilk. Drizzle in the butter as you continue to whisk.
Switch to a wooden spoon and make a well in the middle of the dry ingredients. Pour in the wet ingredients and stir until almost completely combined. Please remember, the more you stir pancakes the more flat and tough they will be so please mix until a few streaks of flour are remaining.

Butter the griddle and scoop 1/3 cup of batter and cook until bubbles begin to form and place berries on topped then flip and cook other side until golden. Serve immediately. With berry syrup, lemon juice and powdered sugar.

Enjoy!!!!!

Tuesday, July 21, 2015

Blueberry Crumb Top Muffins


I have been on a  search for a good go to blueberry muffin recipe, especially sense I have an abundance of blueberries (10 lbs or so) from visiting blueberry farms this summer.
So this last Fourth of July, 2015, I created these. I made 12 and with a family of five they were all gone within 30 minutes. A big hit and new favorite.

Ingredients 

Crumb Topping
1 cup all-purpose flour(1/2 cup almond flour and 1/2 cup all purpose)
3 tablespoons light brown sugar
2 tablespoons granulated sugar
1 teaspoon baking powder
Pinch of salt
6 tablespoons unsalted butter, melted

Muffins
1 3/4 cups all-purpose flour (1/2 cup almond 1 1/4 cup all purpose)
2 1/4 teaspoons baking powder
1/2 teaspoon salt
1 cup granulated sugar
2 large eggs
1/2 cup canola oil (melted shortening)
3/4 cup whole milk (1/4 cup buttermilk and 1/2 cup whole) 
1 teaspoon pure vanilla extract
1 1/2 cups blueberries

Top with raspberry or strawberry syrup and cool whip (once baked). 

Directions 

Preheat the oven to 375°. Line 18 or 12 muffin cups with paper or foil liners or spray 2 muffin tins with cooking spray.

In a medium bowl, combine the flour with the brown sugar, granulated sugar, baking powder and salt. Stir in the melted butter, then pinch the mixture until it forms pea-size clumps.

In a medium bowl, whisk the flour with the baking powder and salt. In a large bowl, combine the sugar, eggs and canola oil and beat with a handheld electric mixer at low speed until combined. Beat in the whole milk and vanilla. Add the flour mixture all at once and beat at low speed until the batter is smooth. Stir in the blueberries.

Spoon the batter into 18 of the cups (with just 12 fill almost full), filling them about three-quarters full. Sprinkle the crumb topping on top of each one and bake for about 30 minutes or until the muffins are golden and a toothpick inserted in the center comes out with a few moist crumbs attached. Let the blueberry muffins cool in the pan for 10 minutes before serving. Top with syrup and frozen cool whip. 


Tuesday, April 21, 2015

Chocolate Chip Pumpkin Bread or Muffins

Who does not love Great Harvest Pumpkin Chocolate Chip Bread and Muffins? After working there and making it went out on online looking for a recipe that is so close to being the one I used to make (for legal reason I did not want to share the exact one I used in the store). Here is the recipe I found. Of course I make some changes. I make my own pumpkin puree for starts. Go here to see how I do it. 

Chocolate Chip Pumpkin Bread 
INGREDIENTS:
1 (15 ounce) can pumpkin puree or 2 cups
4 eggs
1 cup vegetable oil
⅓- ⅔  cup water (optional add only if too thick)
3 cups white sugar
3 1/2 cups all-purpose flour
2 teaspoons baking soda
1 1/2 teaspoons salt
1 teaspoon ground cinnamon
1/2 teaspoon ground cloves
1/4 teaspoon ground ginger
1 bag (16 oz) Milk Chocolate chips (I prefer Ghirardelli)
DIRECTIONS:
1.
Preheat oven to 350 degrees F (175 degrees C). Grease and flour three 7x3 inch loaf pans.
2.
In a large bowl, mix together pumpkin puree, eggs, oil, water and sugar until well blended. In a separate bowl, whisk together the flour, baking soda, salt, cinnamon, nutmeg, cloves and ginger. Stir the dry ingredients into the pumpkin mixture until just blended. Pour into the prepared pans.

3.
Bake for about 50 minutes in the preheated oven. Loaves are done when toothpick inserted in center comes out clean.
ENJOY!!!!!!!!!

Tuesday, April 14, 2015

Country White Sandwich Bread Recipe

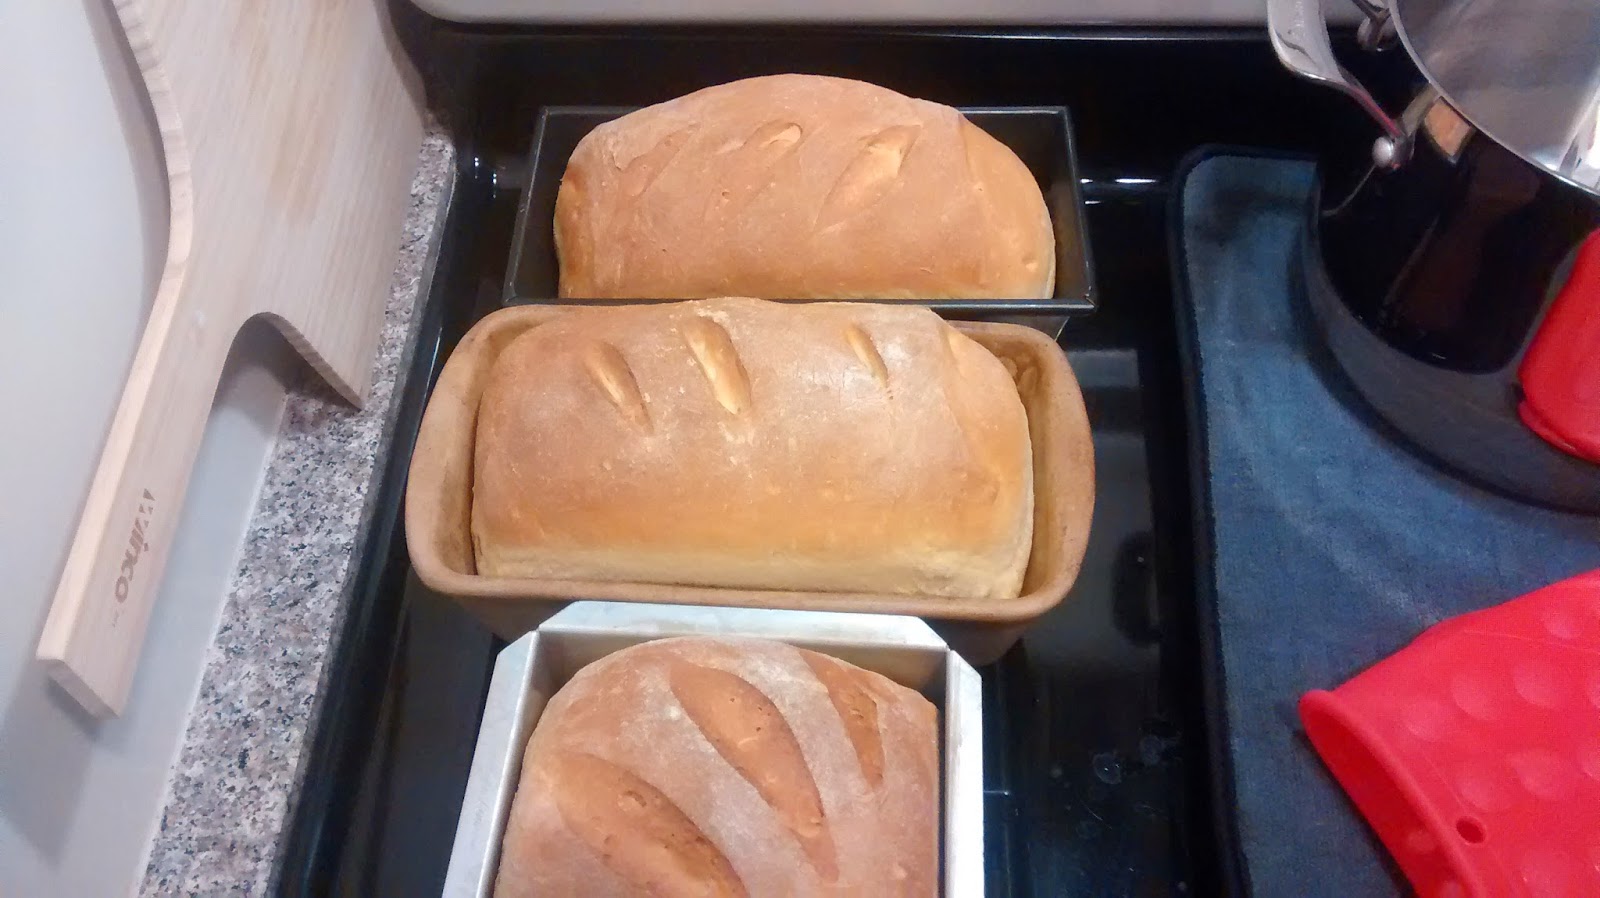
I have been on the search for a great White Sandwich Bread recipe and I then found this recipe. Like like this recipe as well because I felt like the lady knows her bread baking. She is very informative. My family and I are in love with the results. Went through two loafs in three days (family of three). We froze the other loaf for later. I apologize for not taking many pictures of each step I just forgot.
Country White Bread
Makes 3 loaves, about 1½ pounds each


4 cups (1 lb, 4 oz) all-purpose flour
1½ Tablespoons* (17 grams) instant yeast
2 Tablespoons granulated or brown sugar or honey
2 Tablespoons melted butter
4 cups (2 pounds) warm milk (about 85° F)
About 6 cups (1 lb, 13 oz ) bread (high gluten) flour (or all-purpose flour)
1½ Tablespoons (22 grams) salt


* To bake an even better loaf, you can reduce the amount of yeast to 1 Tablespoon (or even less). This will make your dough rise more slowly, so you'll just need to increase the rising times. You can reduce the yeast in pretty much any bread recipe; a lot of bakers go by the formula, 'half the yeast and double the rising time.'


Step 1: The First Rise
In a very large bowl, stir together the all-purpose flour, yeast, and sugar (I use a stand mixer). Make a small well in the middle of the flour mixture and pour in the butter and the milk.
Mix well, then continue to stir vigorously, slowly adding 1 cup of the bread flour at a time, until you've added about 4 cups and have a sticky, shaggy dough; this should take several minutes.
Cover the bowl with a damp tea towel and let it rest for 20 minutes.
Step 2: The Second Rise
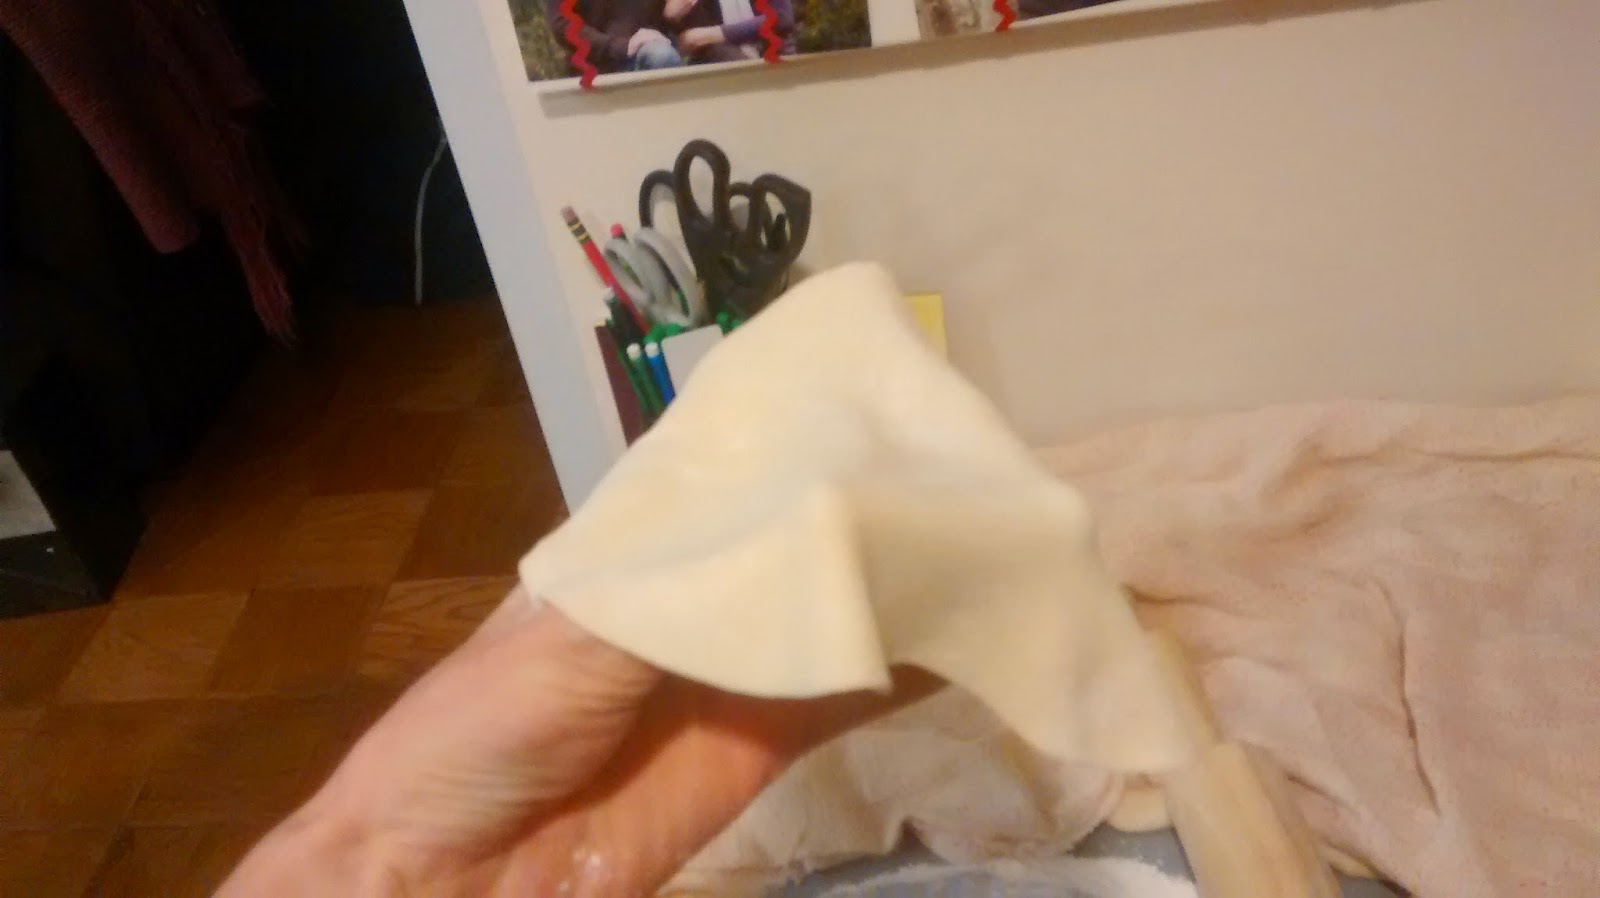
Add the salt and 1 more cup of bread flour and stir it in as best you can. Add another cup of bread flour if the dough is still too sticky to knead. Turn the dough out onto a floured work surface and knead it with floured hands until the dough is soft and smooth, about 8 to 10 minutes (I just keep it in the stand mixer and let it do all the work).
As you're kneading, sprinkle a little more flour at a time as needed to keep it from sticking to your hands or the work surface. You want the dough to be as soft as possible without being sticky; you may not need the entire six cups of bread flour, or you may need a little extra.
Sprinkle flour in the dough bowl, place the dough in it, liberally dust it with flour, and cover it with a damp tea towel. Or you can let it rise in a straight sided, food grade plastic container with a snap-on lid, which is what I do now. Mark the spot on the container that the dough will reach when it has doubled in volume.
Set the dough somewhere that is preferably between 70°F and 75°F until it has doubled in size, about 60 to 75 minutes. Ideally, the dough itself should be between 70°F and 75°F. It's fine if your dough is cooler; it'll just take longer to rise and will end up even tastier.

Step 3: The Third Rise


When the dough is ready to be shaped, you should be able to push a floured finger deep into it and leave an indentation that doesn't spring back. Unless your dough is rising in a straight sided container, it can be difficult to judge whether it has doubled in size, which is the guideline most recipes use. I find the finger poking method to be more reliable.
Turn the risen dough out onto a lightly floured work surface, flattening gently with your hands to break up any large air bubbles. Divide the dough into three equal pieces.
If you're using a baking stone, put it in the cold oven now and heat the oven to 375°.
Shape the dough into loaves. Place the loaves seam side down in greased loaf pans and dust them with flour. I like my sandwich breads to be tall, so I use 8-inch loaf pans.
Cover the loaves with a damp tea towel and let them rise until the dough springs back just a little when you gently poke it with a floured finger, about 40 to 60 minutes.
Bake at 375° for 35 minutes, or until the loaves are golden brown and the bottoms sound hollow if tapped (you need to carefully take a loaf out of the pan to check this). Remove the finished loaves immediately from the pans and let them cool on a wire rack. The bread will continue to bake inside while it's cooling, so try to wait at least 40 minutes before cutting into a loaf.
Store at room temperature or freeze in zipper freezer bags. Make sure the loaves are completely cooled before sealing in bags.


Note I copied the original recipes instructions because I felt that she did an amazing job explaining

Tuesday, March 3, 2015

Honey Lemon Ginger Syrup - for colds, flu and just pure deliciousness!


My dear, dear friend introduced me to this stuff. My husband and I just love it!!! Use it sooth throats, clam the stomach, uplift the mood and get a spoonful of honey. It is very easy to make only requiring three ingredients. 

Honey, we use honey from our parents beehives
Lemons 
Fresh Ginger

Step 1:
I don't measure the ingredients there is no need. You will need any size mason jar (we use a Quart size jar, but if this is your first time use a Pint).

Step 2:
Cut up the lemons either sliced or cut into chunks (I prefer sliced to get more surface area of the lemon).

Step 3:
Skin ginger and microplane (basically it grates it very finely). I like a bit of a kick of ginger so I add about 2-4 tablespoons of grated ginger to a Quart.

Step 4:
Layer the lemons and ginger till they almost reach the top of jar (they will condense as the sit in the honey over night).

Step 5:
Pour in honey using a knife to get it to fill all the spaces in the jar. Fill till it covers the lemons.

Step 6:
Put on lid and let it sit for 6-10 hours. Use to make ice or hot tea (simple spoon into cup for in hot water or ice water and add more honey lemon ginger mixture to your liking) or my favorite by the spoonfuls. YUM!!

Tuesday, December 30, 2014

HOMEMADE TORTILLAS and Black Bean Burritos

I love the freshly made tortillas at Cafe Rio, so I set out to make my own. I learned that they are super easy and just as or even better than Cafe Rio's. Note though they are easy to make it does take time. I recommend making with a friend. One rolls and one bakes the tortillas.
This picture makes me so happy. Hot sauce, tomatoes, and homemade bean burritos. 
Ingredients
  • 3 cups all purpose flour, plus a little extra for rolling the tortillas
  • 1/3 cup oil
  • 1 teaspoon salt
  • 1 teaspoon baking powder
  • 1 cup very warm water
Instructions
Step 1: Combine flour, salt, and baking powder large mixing bowl with a dough hook till combined.
Step 2: Add the oil and water and mix till well combined and continue to mix for another minute.
Step 3: Stop and scrape edges. When mixtures comes together and forms ball decrease the mixing speed to low. Then mix until smooth.
Step 4: Transfer to well floured surface and divided into 8 balls for 12-14 inch tortillas or 16 balls for 6-8 inch tortillas.
Step 5: Flatten each ball with the palm of your hands and let rest for 15 min covered.

Step 6: Heat large flat pan to med-high. Roll each flatten ball into a very then circle using a bit of flour to keep the dough from sticking to the surface and the rolling pin.


Step 7: Transfer the thin tortilla to the hot pan. After 30-45 seconds, when brown splotches show underneath, flip it over. cook another 30 -45 seconds more, until other side is browned.  Do not overcook or the tortilla will become crisp.  Remove and wrap in a cloth napkin.  Repeat procedure with remaining tortillas and stack them on top of each other.Note, cook time is PER tortilla and is approximate.  Go by the way it looks more than you go by time.
See the bubbles. That means it is time to flip.
Husband made me this one and said, "I love you."

Feed to baby
Refried Black beans
Ingredients
  • 2 cans of cooked black beans
  • 3-4 cloves of garlic, minced
  • 1 onion, optional
  • 1-4 tablespoons Fat, amount depends on if using onion
  • 1 teaspoon salt
  • 2-4 teaspoons of taco seasoning
  • water, if needed
  • For fun (or rather health I have added shredded carrots or other vegetables) husband not a fan.
Instructions

Heat the fat in a large skillet over medium heat. Add the onion and cook until tender, about 3 minutes. Stir in the garlic and taco seasoning and cook for 1 minute more. Stir in the beans cook beans on a low simmer for 10-15 minutes. Mash the beans coarsely with potato masher, adding more water to moisten, if needed. Season with salt and pepper, to taste.


Tuesday, December 16, 2014

Whipped Vanilla Bean Cream Cheese Frosting or Filling

Loving this recipe!!! Which I adapted from HERE. I use it for filling for cakes (it is lighter than the regular cream cheese frosting which I use on the outside of cake) and to top my Best Ever Whole Wheat Cinnamon Roll Recipe


The Recipe 
16 oz cream cheese, room temperature
2 to 4 cups powdered sugar
1 teaspoon vanilla
2 teaspoons of vanilla bean paste
1 cup heavy cream, cold. higher the fat content, the better 

The Directions 
Step 1: Beat the cheese, sugar, vanilla and vanilla bean paste until smooth and fluffy.


Step 2: In a separate bowl, beat the heavy cream to nearly stiff peaks.

Step 3: Then add the whipped cream into the cheese mixture and quickly and briefly beat to combine. Do not over beat.
Chocolate cake with the whipped filling. I think I added a bit too much for me. 

Tuesday, December 9, 2014

Homemade Peppermint (Mint Chip or Candy Cane) Ice Cream - With No Machine

As requested here is my Candy Cane Ice Cream recipe. Be sure to also check out my Rocky Road Chocolate Ice Cream recipe. 

The base for this recipe is vanilla recipe from this site. So you can get creative with it and add whatever flavor you want. I have made both Mint Chip Ice Cream and Candy Cane Ice Cream

Peppermint Ice Cream Recipe
·       1 cup Whole Milk
·       A pinch of salt
·       3/4 cup Sugar or Honey (the honey adds a bit for flavor and even creamier texture)
·       2 ½ cups heavy cream
·       5 large egg yolks
·       10 drop Peppermint Essential Oil
·       2 PEPPERMINT Tea bags or Fresh Peppermint leaves (optional)
·       For MINT CHIP add either chocolate chips or melted chocolate
·       For CANDY CANE add 10-12 crushed candy canes
·       For richer custard, you can add up to 3 more egg yolks. For less-rich custard, substitute half-and-half for the heavy cream, realizing that the final texture won’t be as rich or as smooth as if using cream.
Step 1: Heat the milk, salt, and sugar (or honey) in a saucepan.

Step 2: (OPTIONAL) Add the tea bags or peppermint leaves to the milk. Cover, remove from heat, and infuse for one hour.

Step 3: Pour cream into a freezer safe bowl and set a strainer over the top.

Step 4: In a separate bowl, stir together the egg yolks. Re warm the milk and remove tea bags or leafs then gradually pour some of the milk into the yolks, whisking constantly as you pour. Scrape the warmed yolks and milk back into the saucepan.

Step 5: Cook over low heat, stirring constantly and scraping the bottom with a heat-resistant spatula, until the custard thickens enough to coat the spatula or temperature reads 170 F on a candy or instant read thermometer.
Step 6: Strain the custard into the heavy cream. Stir and add the peppermint oil, then refrigerate to chill thoroughly. Preferably overnight.

Step 7: Freeze the custard in your ice cream maker according to the manufacturer’s instructions. From here you have two options to use an ice cream machine or to not. I do not have a machine yet, so the first option you have is without the machine.

Step 8 (option 1): Remove mixture from the refrigerator and stir with a rubber spatula. Transfer the mixture to a deep freezer-safe bowl or container and place in the freezer for 45 minutes. As it starts to freezer near the edges, remove from the freezer and stir vigorously with a fork or whisk, being sure to break up any frozen sections. Return it to the freezer. Continue to check every 30 minutes, stirring vigorously as it’s freezing. When it starts to thicken either add candy canes or chocolate (the candy canes will turn the ice cream red). It is estimated that it will take 2-3 hours for the ice cream to sufficiently frozen and ready.
Crush the candy canes with a little help.
When it starts to thicken add the candy canes.

Step 8 (option 2): Then freeze it in your ice cream maker according to the manufacturer's instructions. At some point add the candy canes or chocolate (If the cold mixture is too thick to pour into your machine, whisk it vigorously to thin it out.)