In
my effort to save money and be more environmentally friendly, I
discovered that this is a thing!!! WOOL DRYER BALLS. I will tell you
the things that I have learned. Information I used found mainly at this site.

First,
what are wool dryer balls?
They
are an eco-friendly alternative to dryer sheets and liquid
fabric softener.
Second,
What are the benefits
of using wool balls in your dryer?
- They decrease drying time, saving you money on utility bills. (Especially helpful in the winter months!)
- Commercial fabric softeners and dryer sheets are filled with harmful chemicals and perfumes that coat your clothing, eventually ending up on your skin. These chemicals can be especially harsh on sensitive skin. There are no chemicals in wool dryer balls!
- Commercial dryer sheets can be costly, and are thrown away after use. Wool dryer balls can be re-used for years, saving you hundreds of dollars.
- Commercial fabric softeners shouldn’t be used on cloth diapers. Wool dryer balls are perfect for keeping your cloth diapers soft and chemical-free.
- Wool dryer balls won’t affect the absorbency of your towels, kitchen cloths, or cloth diapers – commercial softeners will.
- 100% wool dryer balls increase fluffiness and reduce static as dryer loads tumble.
- Dryer balls help to soften clothes naturally.
- Dryer balls are made from a renewable resource.
Third,
how do they work?
“It’s
simple. They bounce around in the dryer separating clothes, allowing
more hot air to circulate through all the garments. As they tumble,
the wool balls fluff your laundry, reduce wrinkles, and basically
pummel the laundry to make it softer. They do so much more than a
dryer sheet by pulling moisture out of your clothes so you don't have to run the dryer as long. The more dryer balls you have in a
load, the shorter the drying time will be.``
Fourth,
how do you make your own?
TO
make yarn felted wool dryer balls go to this site for instructions.
I
will show you how I made mine out of scrape wool material. LUCKLY
someone gave me loads of wool material cut into 1 inch strips that
was to be used for a rug project but they never got to it.
Materials
Wool
cut in to 1 inch strips as long as you can get them (then sew
together to make it longer)
Needle
and Thread
Scissors
Panty
hose
String
Instructions
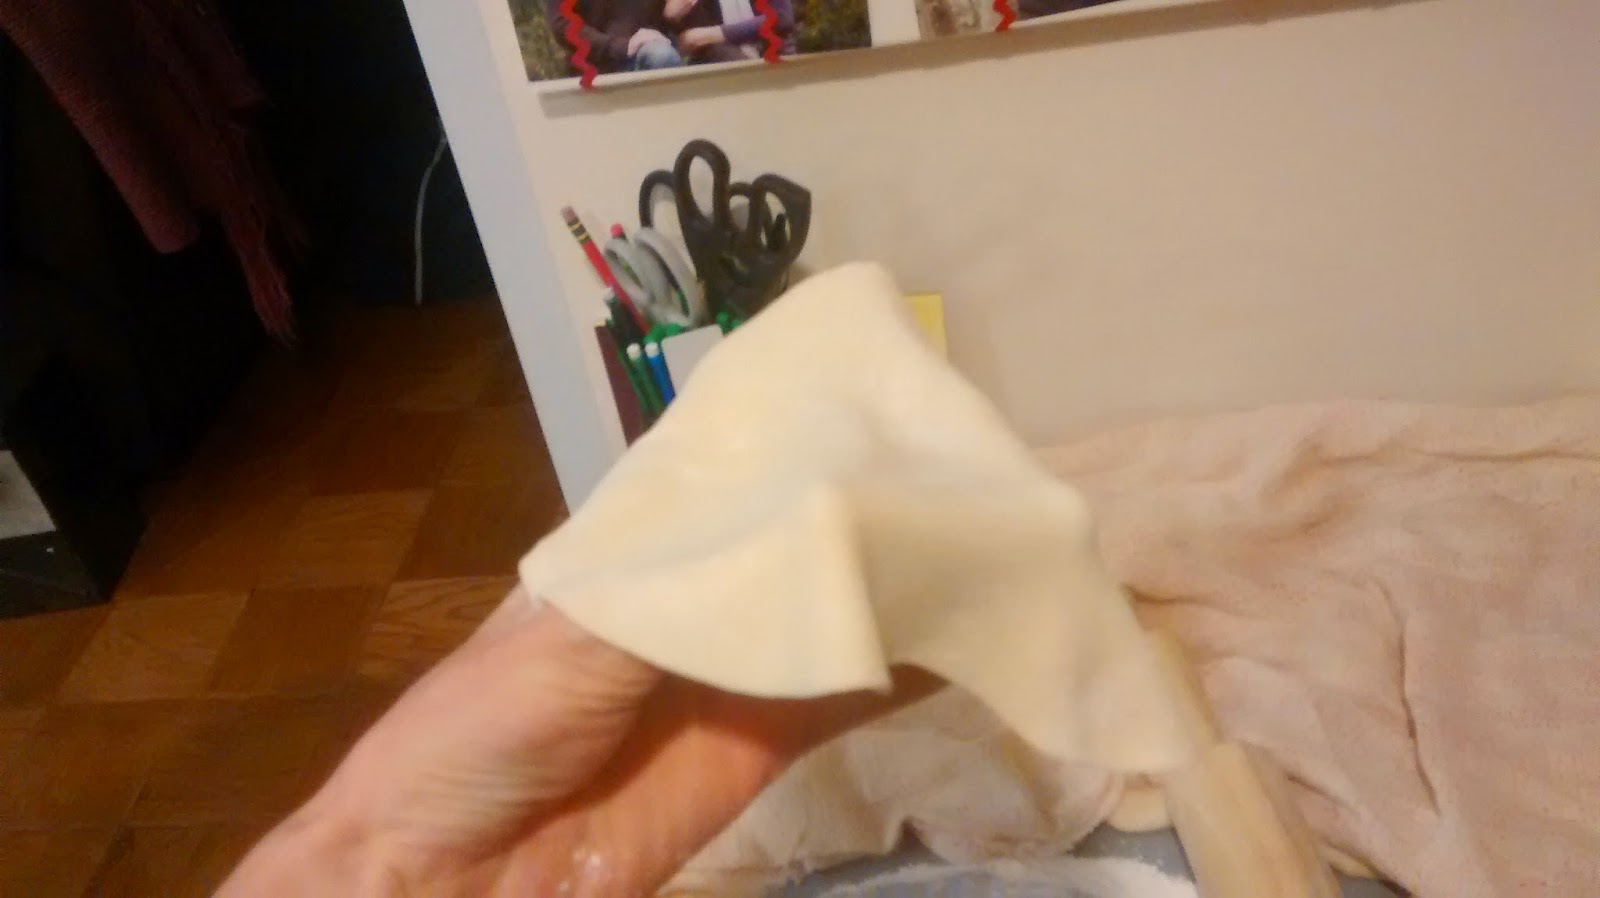
Step
1: Begin by wrapping the strip of wool into a ball. Continue till you
have the desired size ball. About the size of tennis ball.


Step
2: With needle and thread begin the sew the
strips of wool together as shown.


Step
3: Repeat till you have 4 to 6 balls. I made 6 balls.
|
| In picture you will see that I have a store bought wool dryer ball. |
Step
4: Cut
the leg off an old pair of pantyhose. Put balls into the toe of the
pantyhose, tying tightly in between each one with string, or
cotton/acrylic yarn. (Just don’t use wool yarn or it will felt
around the pantyhose.)
Step
5: Throw the entire yarn caterpillar into the wash with towels (or a
load of jeans if you used brightly colored yarn).
Step
6: Wash in a hot wash
cycle with a cold water
rinse cycle. Dry your yarn caterpillar with your laundry
using the hottest
dryer setting.
Step
7: Ready to use just throw the balls in the dryer when using. I like
to add a a couple drops of Essential oils to the ball every once in a
while to add extra scent to my load of laundry
Doterra
essential oils that I like to add include; Peppermint, Lavender,
Lemon, and Wild Orange.
Citrus essential oils, such as lemon and sweet orange, actually help boost the cleaning power of homemade detergents.
Lavender essential oil has a clean, floral, fresh scent which soothes, calms and relaxes.
Citrus essential oils, such as lemon and sweet orange, actually help boost the cleaning power of homemade detergents.
Lavender essential oil has a clean, floral, fresh scent which soothes, calms and relaxes.
Lavender is the most popular floral scent for cleaning supplies, and it is probably also one of the most popular oils for aromatherapy uses as well.
One of the reasons for this, beside its nice scent, is that lavender blends well with many other essential oils, including citruses and other florals.
Peppermint essential oil is a favorite for many people that make their own cleaning products, because of its refreshing, bright minty smell.
It blends well with several other popular essential oils for cleaning, including lavender, eucalyptus, lemon and rosemary. An added use of peppermint oil is as a natural pest deterrent.
To come is my post on My Homemade Laundry detergent.
Click
here to learn more about essential oils or here to visit my Doterra
website.