Showing posts with label Desserts. Show all posts

Tuesday, April 21, 2015

Chocolate Chip Pumpkin Bread or Muffins

Who does not love Great Harvest Pumpkin Chocolate Chip Bread and Muffins? After working there and making it went out on online looking for a recipe that is so close to being the one I used to make (for legal reason I did not want to share the exact one I used in the store). Here is the recipe I found. Of course I make some changes. I make my own pumpkin puree for starts. Go here to see how I do it. 

Chocolate Chip Pumpkin Bread 
INGREDIENTS:
1 (15 ounce) can pumpkin puree or 2 cups
4 eggs
1 cup vegetable oil
⅓- ⅔  cup water (optional add only if too thick)
3 cups white sugar
3 1/2 cups all-purpose flour
2 teaspoons baking soda
1 1/2 teaspoons salt
1 teaspoon ground cinnamon
1/2 teaspoon ground cloves
1/4 teaspoon ground ginger
1 bag (16 oz) Milk Chocolate chips (I prefer Ghirardelli)
DIRECTIONS:
1.
Preheat oven to 350 degrees F (175 degrees C). Grease and flour three 7x3 inch loaf pans.
2.
In a large bowl, mix together pumpkin puree, eggs, oil, water and sugar until well blended. In a separate bowl, whisk together the flour, baking soda, salt, cinnamon, nutmeg, cloves and ginger. Stir the dry ingredients into the pumpkin mixture until just blended. Pour into the prepared pans.

3.
Bake for about 50 minutes in the preheated oven. Loaves are done when toothpick inserted in center comes out clean.
ENJOY!!!!!!!!!

Friday, January 16, 2015

Started an Etsy Shop for Sweet Change Bake Shop

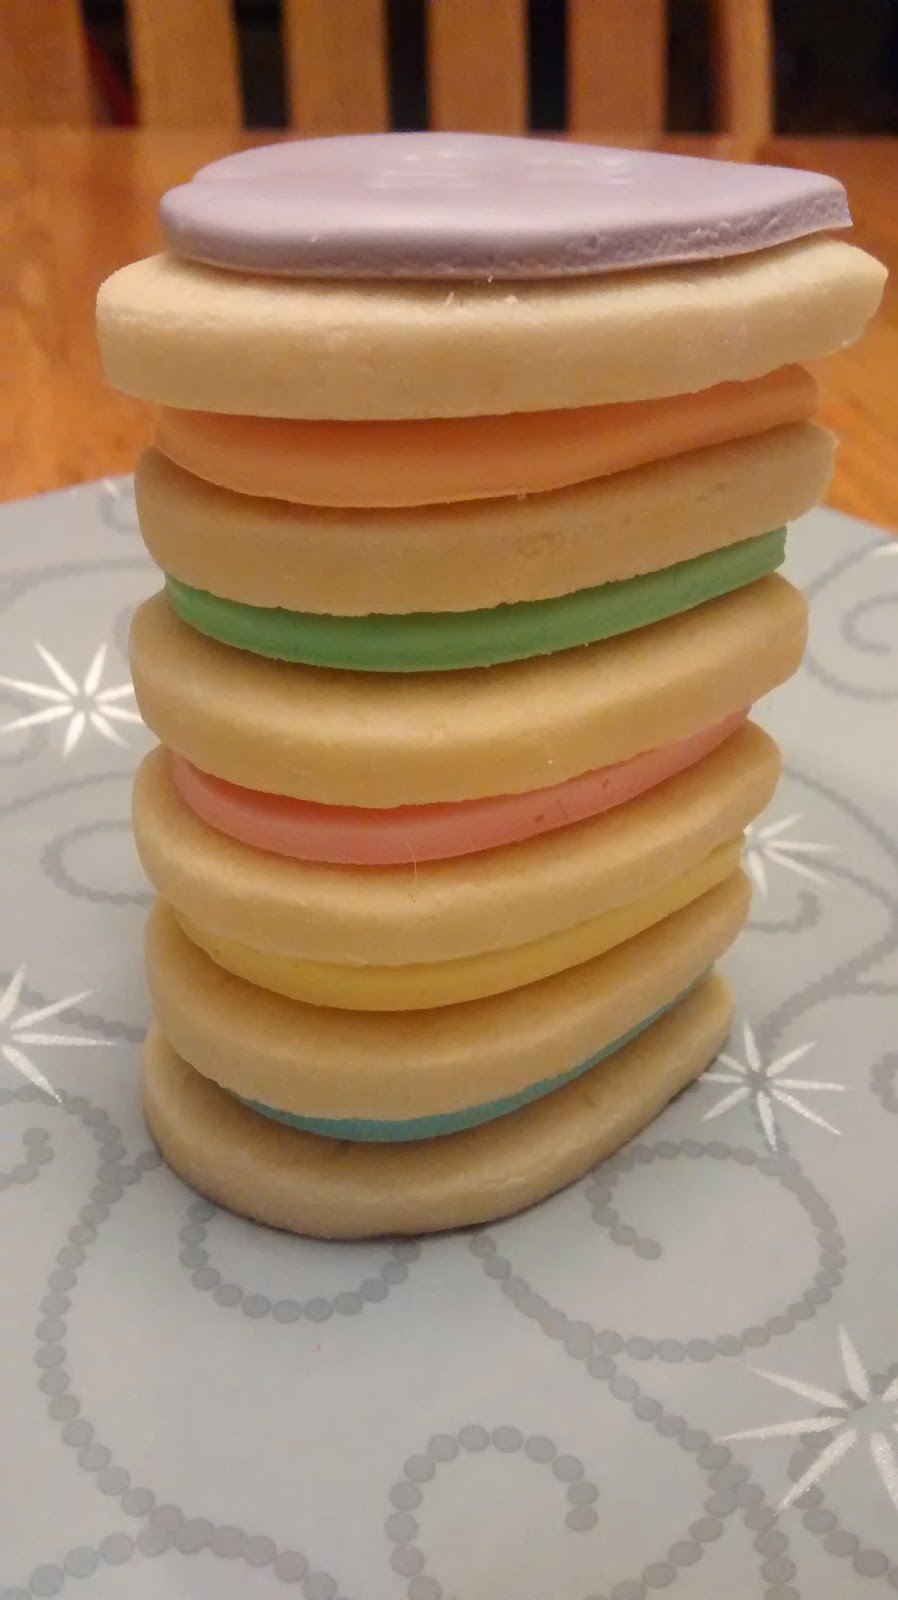
Starting out with heart shaped cookies for Valentines Day. Had so much fun making these cookies. They are modeled after the Conversation Heart Boxed Candies. Many different options to choose from from flavored to gluten free. CHECK IT OUT!

Get your loved ones and school mates their hearts while they last. Made to order. Enjoy my low promotional prices! Special orders available as well.

Tuesday, December 16, 2014

Whipped Vanilla Bean Cream Cheese Frosting or Filling

Loving this recipe!!! Which I adapted from HERE. I use it for filling for cakes (it is lighter than the regular cream cheese frosting which I use on the outside of cake) and to top my Best Ever Whole Wheat Cinnamon Roll Recipe


The Recipe 
16 oz cream cheese, room temperature
2 to 4 cups powdered sugar
1 teaspoon vanilla
2 teaspoons of vanilla bean paste
1 cup heavy cream, cold. higher the fat content, the better 

The Directions 
Step 1: Beat the cheese, sugar, vanilla and vanilla bean paste until smooth and fluffy.


Step 2: In a separate bowl, beat the heavy cream to nearly stiff peaks.

Step 3: Then add the whipped cream into the cheese mixture and quickly and briefly beat to combine. Do not over beat.
Chocolate cake with the whipped filling. I think I added a bit too much for me. 

Tuesday, December 9, 2014

Homemade Peppermint (Mint Chip or Candy Cane) Ice Cream - With No Machine

As requested here is my Candy Cane Ice Cream recipe. Be sure to also check out my Rocky Road Chocolate Ice Cream recipe. 

The base for this recipe is vanilla recipe from this site. So you can get creative with it and add whatever flavor you want. I have made both Mint Chip Ice Cream and Candy Cane Ice Cream

Peppermint Ice Cream Recipe
·       1 cup Whole Milk
·       A pinch of salt
·       3/4 cup Sugar or Honey (the honey adds a bit for flavor and even creamier texture)
·       2 ½ cups heavy cream
·       5 large egg yolks
·       10 drop Peppermint Essential Oil
·       2 PEPPERMINT Tea bags or Fresh Peppermint leaves (optional)
·       For MINT CHIP add either chocolate chips or melted chocolate
·       For CANDY CANE add 10-12 crushed candy canes
·       For richer custard, you can add up to 3 more egg yolks. For less-rich custard, substitute half-and-half for the heavy cream, realizing that the final texture won’t be as rich or as smooth as if using cream.
Step 1: Heat the milk, salt, and sugar (or honey) in a saucepan.

Step 2: (OPTIONAL) Add the tea bags or peppermint leaves to the milk. Cover, remove from heat, and infuse for one hour.

Step 3: Pour cream into a freezer safe bowl and set a strainer over the top.

Step 4: In a separate bowl, stir together the egg yolks. Re warm the milk and remove tea bags or leafs then gradually pour some of the milk into the yolks, whisking constantly as you pour. Scrape the warmed yolks and milk back into the saucepan.

Step 5: Cook over low heat, stirring constantly and scraping the bottom with a heat-resistant spatula, until the custard thickens enough to coat the spatula or temperature reads 170 F on a candy or instant read thermometer.
Step 6: Strain the custard into the heavy cream. Stir and add the peppermint oil, then refrigerate to chill thoroughly. Preferably overnight.

Step 7: Freeze the custard in your ice cream maker according to the manufacturer’s instructions. From here you have two options to use an ice cream machine or to not. I do not have a machine yet, so the first option you have is without the machine.

Step 8 (option 1): Remove mixture from the refrigerator and stir with a rubber spatula. Transfer the mixture to a deep freezer-safe bowl or container and place in the freezer for 45 minutes. As it starts to freezer near the edges, remove from the freezer and stir vigorously with a fork or whisk, being sure to break up any frozen sections. Return it to the freezer. Continue to check every 30 minutes, stirring vigorously as it’s freezing. When it starts to thicken either add candy canes or chocolate (the candy canes will turn the ice cream red). It is estimated that it will take 2-3 hours for the ice cream to sufficiently frozen and ready.
Crush the candy canes with a little help.
When it starts to thicken add the candy canes.

Step 8 (option 2): Then freeze it in your ice cream maker according to the manufacturer's instructions. At some point add the candy canes or chocolate (If the cold mixture is too thick to pour into your machine, whisk it vigorously to thin it out.)

Tuesday, December 2, 2014

Homemade Rocky Road Chocolate Ice Cream - Without an Ice Cream Machine

When people ask if I like ice cream I reply “only good ice cream.” I am lactose intolerant in that my body can only handle a certain amount of lactose (a sugar found in dairy products). What does this have to do with ice cream? Well ice cream most of the time will upset my stomach a little eve if I have been avoiding dairy all day, so if I am going to have a bowl it better be DELICIOUS or it is not worth it.  This recipe (that I found here) is worth it. Technically it is not ice cream but rather a gelato.
INGREDIENTS:

2 1/2 cups Heavy Cream
3 tablespoons Unsweetened Cocoa Powder
5 ounces Bittersweet or Semisweet Chocolate, Chopped
1 cup Whole Milk
¾ cup Sugar or Honey (I use HONEY, yum)
Pinch of salt
5 Egg Yolks
½ teaspoon Vanilla Extract
1 cup Miniature Marshmallows
1 cup Chopped Nuts, Walnuts, Almonds, or Pecans

DIRECTIONS:

Step 1: Warm 1 cup of the cream with the cocoa powder in a medium saucepan, whisking to thoroughly blend the cocoa. Bring to a boil, then reduce the heat and simmer at a very low boil for 30 seconds, whisking constantly.

Step 2: Remove from the heat and add the chopped chocolate, stirring until smooth. Then stir in the remaining 1 1/2 cup cream. Pour the mixture into a large bowl, scraping the saucepan as thoroughly as possible, and set a mesh strainer on top of the bowl.
I love Trader Joe's chocolate bars for all my baking needs. taste great at a decent price
Step 3: Warm the milk, sugar (honey), and salt in the same saucepan. 
Step 4: In a separate medium bowl, whisk together the egg yolks. Slowly pour the warm milk into the egg yolks, whisking constantly, then scrape the warmed egg yolks back into the saucepan.
Step 5: Stir the mixture constantly over medium heat with a heatproof spatula, scraping the bottom as you stir, until the mixture thickens and coats the spatula (and reaches 170 degrees F on an instant-read thermometer).
Step 6: Pour the custard through the strainer and stir it into the chocolate mixture until smooth, then stir in the vanilla. Stir until cool over an ice bath or at room temp till cool.

Step 7: Chill the mixture thoroughly in the refrigerator (overnight). From here you have two options to use an ice cream machine or to not. I do not have a machine yet, so the first option you have is without the machine.
Step 8 (option 1): Remove mixture from the refrigerator and stir with a rubber spatula. Transfer the mixture to a deep freezer-safe bowl or container and place in the freezer for 45 minutes. As it starts to freezer near the edges, remove from the freezer and stir vigorously with a fork or whisk, being sure to break up any frozen sections. Return it to the freezer. Continue to check every 30 minutes, stirring vigorously as it’s freezing. It is estimated that it will take 2-3 hours for the ice cream to sufficiently frozen and ready.
Keep Stirring every 30-60 min.
After a while it will thicken up, this is when you will had your nuts and marshmallows. Great thing about making your one you can add as much as you want!!!!
Toasted Almonds
And store in whatever you have available. I like to save store bought gelato containers (sturdy plastic), but here I was as my parents house. 
 Step 8 (option 2): Then freeze it in your ice cream maker according to the manufacturer's instructions. (If the cold mixture is too thick to pour into your machine, whisk it vigorously to thin it out.) Once the ice cream has finished churning, fold in the marshmallows, walnuts and chocolate chips.